Put Your Hanging Porch Plants on Autopilot with Automatic Drip Irrigation
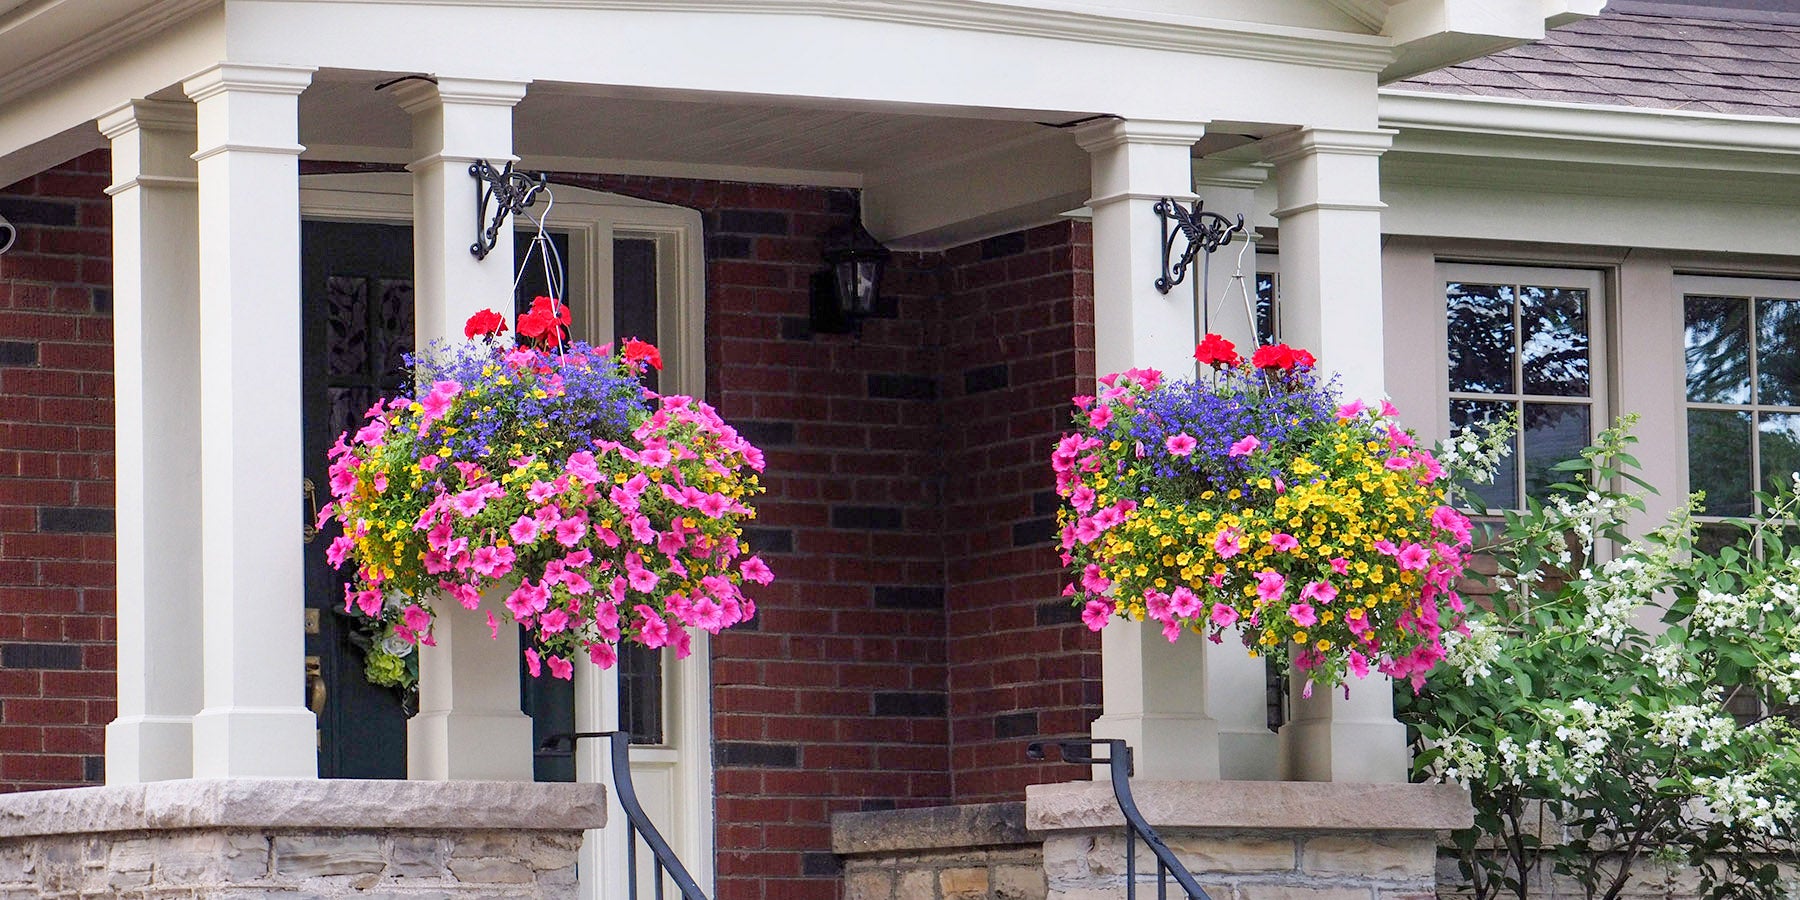
At our house, Mother's Day is the unofficial start of the spring planting season. As is our tradition, my wife receives the same gift each year, a hanging basket of colorful petunias which she dutifully hangs on a hook on the front porch. Predictably, the weekend also includes a trip to the garden center to purchase more hanging plants, usually flower baskets and ferns, that round out our porch flower garden.
Until recently, keeping these hanging plants looking their best throughout the season was a constant task that required daily watering, often early morning before the heat of the summer day, and clumsily lifting the watering can or dragging a hose up to the porch to reach the hanging containers, while doing our best to keep our work clothes dry and still have time to make our morning commute. And if we took a summer vacation, we needed to hire a house sitter just to water the plants.
That's why we were excited to introduce automatic drip irrigation to water our porch plants. With drip irrigation, our hanging porch plants can stay hydrated and healthy without us having to lift a finger. It is the perfect solution for easy, automated plant care. If you want to explore the convenience of automatic drip irrigation for your own porch flowers and container plants, here's what you should know:
The benefits of drip irrigation for hanging porch plants
Drip irrigation is an efficient and cost-effective way of watering hanging porch plants. By installing a drip system, you can achieve sustained, consistent moisture for your plants without daily manual watering. This is especially helpful for watering hard-to-reach plants. By installing tubing from above, you can deliver water directly to individual hanging plants such as long-lasting baskets of perennials or ferns, or larger hanging container plants, like tomato vines.
Drip irrigation systems use low-pressure emitters that deliver water directly to your hanging basket. Some emitters trickle water slowly directly onto the soil around the roots of your plants, while others emit a spray or mist. This offers many options to customize your porch drip system for your specific plants.
Not to be overlooked, is the time-savings. Let’s face it. Most of us would rather spend our time enjoying a leisurely cup of coffee, or just about anything rather than watering plants!
Installing automatic drip irrigation on your porch
Installing your own automatic drip irrigation system is easier than you think. Most systems consist of a run of 1/4 inch tubing with emitters, connected to an automatic timer. Easy DIY installation can be set up in a matter of hours. Your local garden center should have all the parts, tools and supplies you will need, including timers, tubing and emitters, as well as detailed instructions.
TIP: The Rain Bird Drip Irrigation Repair & Expansion Kit has all the hosing, drippers and other parts you’ll need to get started with drip irrigation for your container garden.
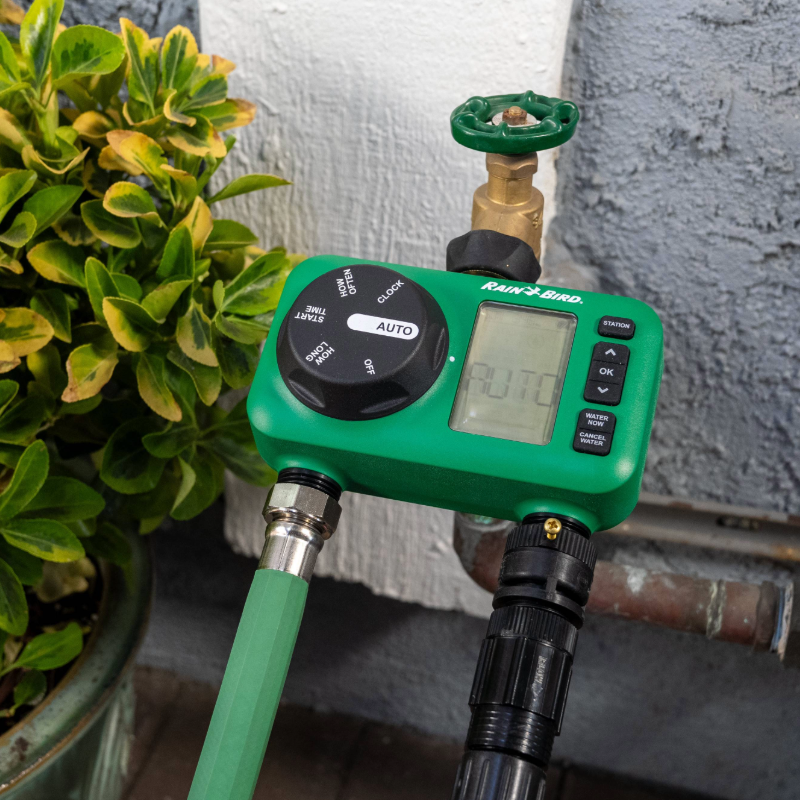
Timer
Though optional for a drip system, a hose-end timer or controller provides the convenience of automation to your drip irrigation system. Connect the timer to your outside hose faucet and program the timer to turn on the water at a particular time and for a specific interval each day. Rain Bird's Easy to Program Hose End Timer, Electronic Hose End Timer, or Premium Hose End Timer works perfectly with drip systems, providing the consistent watering schedule your garden needs to thrive.
You will also need a screen filter, backflow preventer and pressure regulator. An adapter may also be needed to connect the smaller drip tubing.
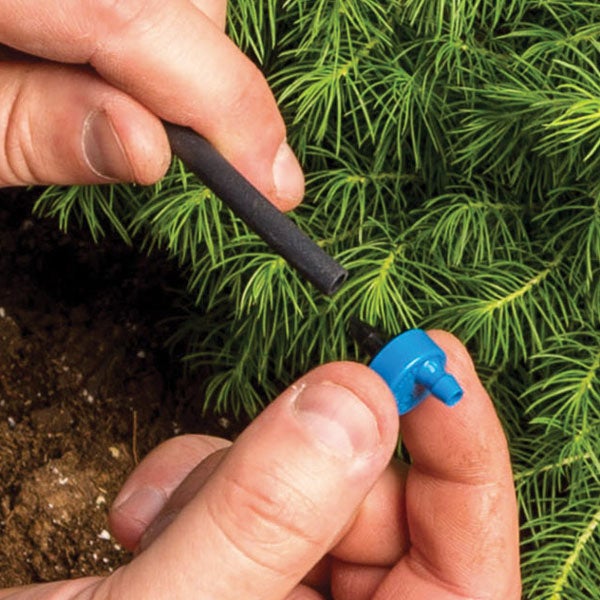
Tubing and emitters
Water is carried to your hanging baskets through plastic tubing. Be sure to take into account the size of your porch before you start setting up your system to determine how much tubing you'll need. Most container plant watering systems use ¼ inch tubing, but ½ inch tubing will provide greater water flow for longer runs of 30 feet or more.
To maintain the appearance on your porch, try your best to hide the tubing by routing it along the porch ceiling fascia or neatly under the siding. Use tubing clips to hold your tubing in place.

To branch off to each of your hanging porch plants, cut the main tubing at the location of the individual plant. Insert a T-shaped fitting to attach a smaller section of tubing, then attach an emitter to the end that will drip water your hanging basket. The type of plants you are watering will determine the type of dripper or emitter is best suited for your hanging plants.
See our article, "How to Plan an Automatic Drip Watering System for Container Plants," for a helpful checklist.
Troubleshooting common issues with drip irrigation systems
After installing your drip system, it's time to test and troubleshoot any problems.
- Slowly turn on the water to test for leaks. A slow leak can waste a lot of water over time and may even cause structural damage to your home.
- Check the emitters and make sure they are producing a steady, consistent flow of water to each plant. If your plants seem to be drying out too quickly even though you have programmed the timer correctly, then adjust the flow rate of each emitter.
- Check the pressure of your drip system. Too much pressure will cause overspray and run-off, while too little pressure can prevent the water from reaching your plants.
- Make sure that all your tubing is free from obstructions or clogs. If the emitters become clogged over time, use a fine wire to unclog them, then flush them with clean water.
Whether you're setting up drip irrigation on your porch or patio, or expanding an existing system, Rain Bird offers convenient kits to make this DIY gardening project installation simple. With automatic drip irrigation, you can enjoy the beauty of your hanging basket garden, without worrying about whether your plants are getting the water they need.

