How to Set Up an Automatic Drip Watering System for Your Container Plants
A drip watering system can take much of the work out of tending to flowers or vegetables, and with a digital timer in your setup, you can be sure all your plants are watered regularly with the proper moisture for spectacular plant yields. It takes the worry out of watering. In fact, you don’t even have to think about it. Get ready to toss your watering can! Let's get started with the setup.
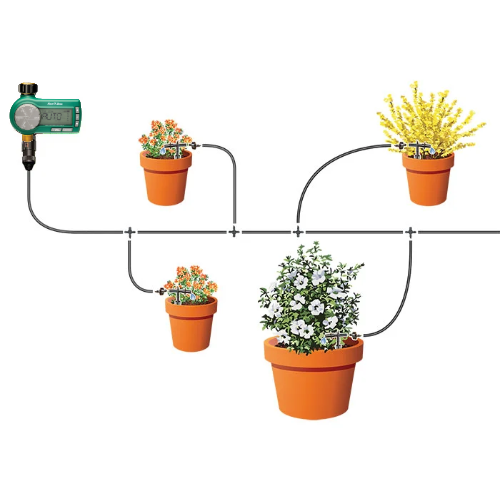
This basic drip installation will water up to six small or midsize pots and can be run from an outside faucet with easy-to-connect ¼ in. tubing. All the parts–except for the timer and backflow preventer–come with the Rain Bird Patio Plant Watering Kit. The timer shown is Rain Bird's Premium Hose-End Timer model 1ZEHTMRP.
Another optional part is the Backflow Preventer which can be purchased separately. If the tops of your pots are below the faucet and the overall watering layout slopes away, you may not need a backflow device. Its purpose is to prevent water from flowing back into the home's drinking water system.
For a handy checklist of parts commonly used for customized, see our article about planning your drip irrigation system.
Step 1: Connect to Faucet
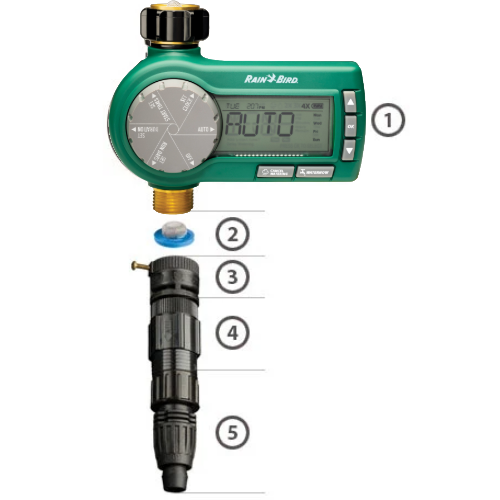
Insert batteries in the timer, then attach components in this order from top to bottom:
- Timer
- Filter
- Backflow preventer
- Pressure regulator
- Hose adapter
If you wish to maintain a hose connection at the faucet, use a hose splitter with shutoff levers. You can find one at your local hardware store or home improvement center. Attach that first to your faucet, above the timer.
Step 2: Run Tubing to Container Locations
- Insert one end of the ¼ in. tubing in the adapter and screw it onto the bottom of the pressure regulator.
- Uncoil the tubing and roughly position it near your planters, leaving about two-to-three feet at the end to allow for final adjustments. Place this main run of tubing so that it is out of sight where possible and also away from any ground areas where you may be working up the soil in the future. If the tubing is placed on a deck or along a building, you can also fix its placement by using the supplied mounting clips. Just be sure to leave enough slack for the next assembly steps.
- Cut and save the remaining tubing for use in Step 3.
Step 3: Cut and Attach Tubing at Each Container
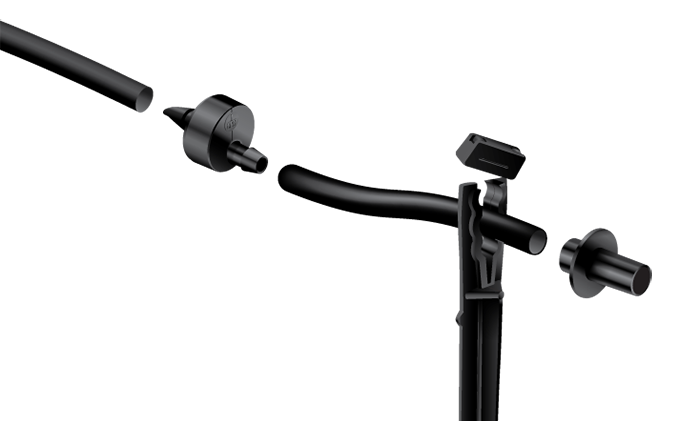
- Cut the main tubing line near each container and insert a tee.
- Run a short length of tubing up to the top of each container where you will later add the drippers. If you are doing this before you've added soil to the container, you can conceal the tubing by routing it up through the drain hole at the bottom. Elevate the container an inch or two with block spacers to allow the tubing to curve up through the hole without kinking.
- Continue adding the branched tubing pieces at each container.
Tip: To make it easier to insert the barbed fittings, soften the tubing ends by soaking them in a jar of hot water.
Step 4: Attach Watering Devices and Stake in Place
The kit includes 10 drippers – five with 1 GPH flow for small pots and five with 2 gallons per hour (GPH) flow for larger containers and plants. You can also place two drippers in a container if needed for watering of larger surface areas. The kit comes with two extra tees to allow creating that additional branching.
- The drippers are barbed on both ends, allowing them to be inserted inline as shown. Note that the sharp barb should face in the direction of flow. Cut an additional piece of tubing and place it on that outflow barb.
- Finish up each container, adding devices and using the plastic stakes to locate devices where you want them. The plastic stakes have bug caps that you add to the tubing ends, helping keep the devices insect-free and clear throughout the season.
Step 5: Check Flow by Turning on the Timer
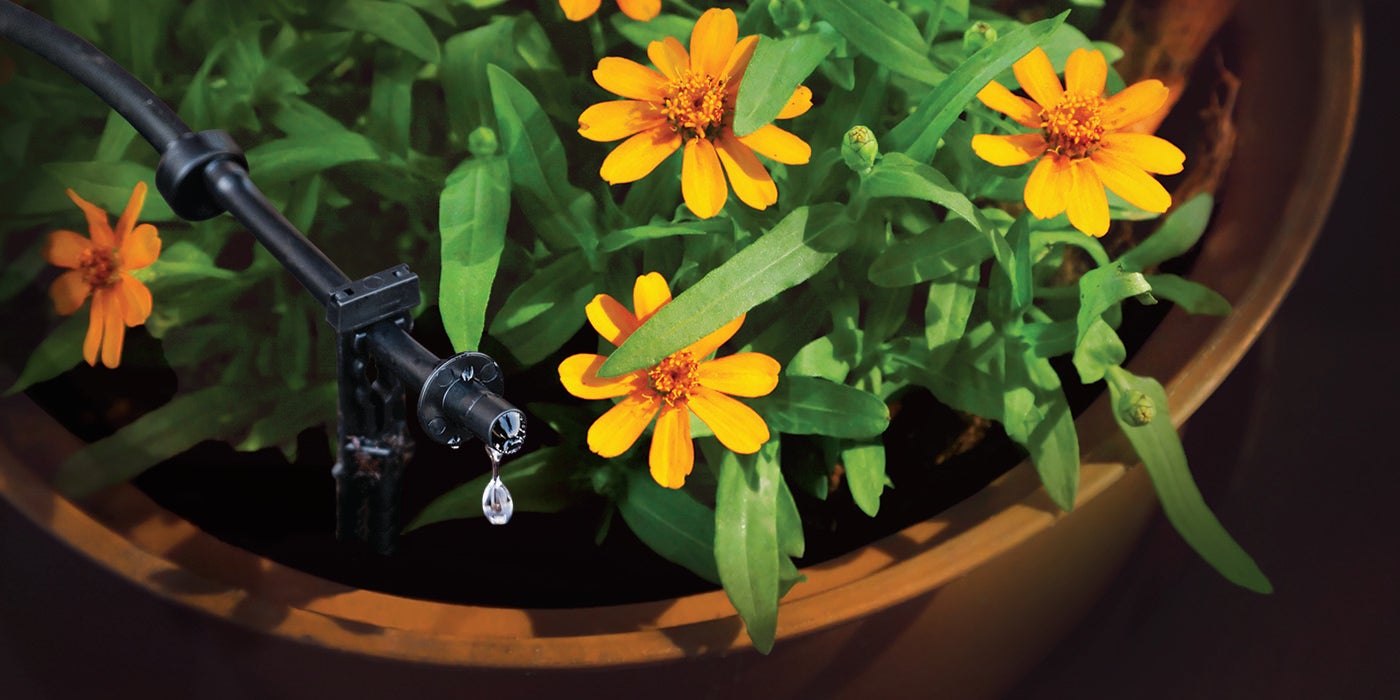
Drippers provide targeted watering at the base of your plants. Check to be sure they are all being watered and are spaced appropriately.
Following these five simple steps, you can easily install an automatic drip irrigation system to keep your container plants watered properly watered throughout the season.

